A lot of Windows 10 users are experiencing high disk usage and cpu usage problem. When i digged into the problem, i found that that high ram usage or high cpu consumption by windows 10 os may be due to some extra processes and features turned on mainly and sometime due to outdated drivers in your system. I am listing here the most responsible things which you can fix to solve the problem. Find out what works for you and please feel free to comment about your experience.
Also read: 16 Awesome tips for making your Windows 10 Super Fast
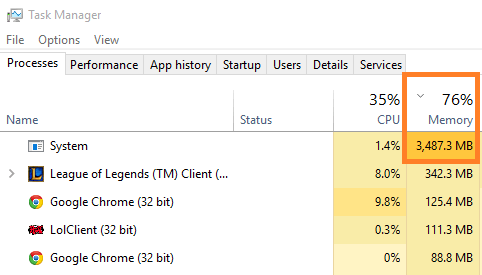
How to fix windows 10 High RAM and CPU usage problem
Go for these solutions to reduce RAM and CPU usage on your computer.
1) Change a particular registry value-
NOTE–
Before going ahead to the main fix, we strongly suggest you to create a a backup of the registry on your computer. After opening Registry Editor, click on “File” > “Export” to create the backup.
If anything goes wrong you can retrieve your registry by simply importing the backup.
1. Press Windows key+R together to launch Run window on your computer.
2. Type “regedit” in Run window and then click on “OK“.
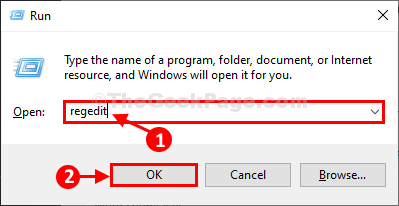
Registry Editor window will be opened.
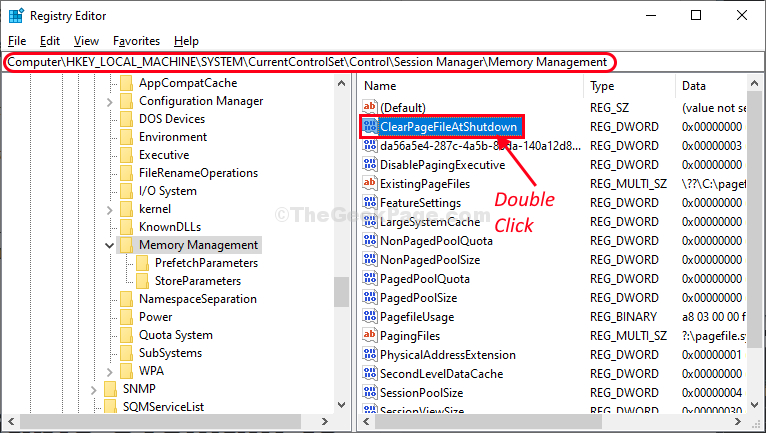
3. In Registry Editor window, on the left hand side, navigate to this location-
HKEY_LOCAL_MACHINE\SYSTEM\CurrentControlSet\Control\Session Manager\Memory Management
4. Now, on the right hand side, double click on “ClearPageFileAtShutDown” to modify it.
5. In Edit DWORD (32-bit) Value window, set the ‘Value data:‘ to “1” and then click on “OK” to save the value change.
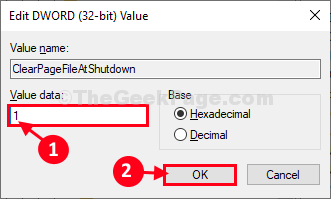
Once it is done, close Registry Editor window.
Reboot your computer to let the changes take effect.
After rebooting check the ram and CPU usage on your computer. It should drop significantly.
2 ) Disable SysMain to solve windows 10 high cpu usage-
Step 1 – Search services in windows 10 taskbar search box. Click on services.

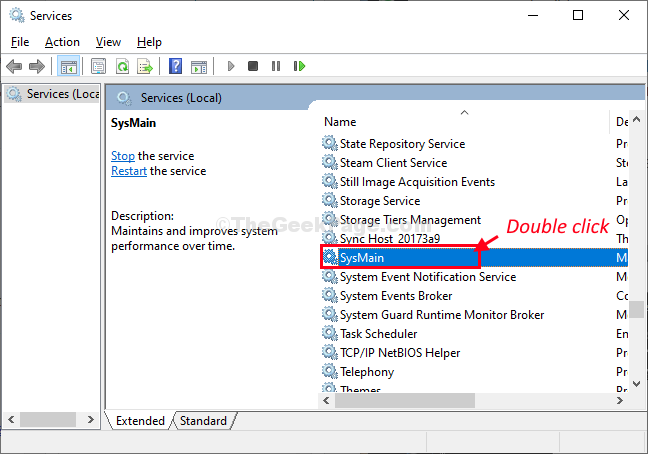
Step 2 – Scroll down and find “SysMain” in the right side of Services window.
Step 3- Double click on “SysMain” to access it’s properties.
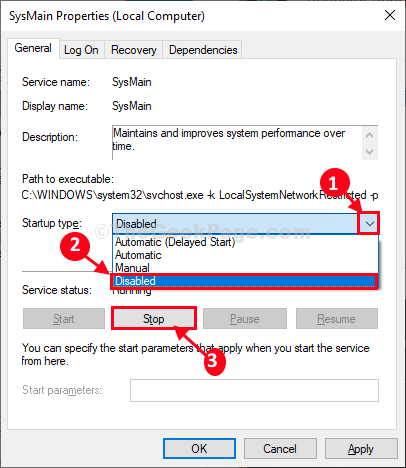
Step 4- In SysMain Properties widow, click on the ‘Startup type:‘ and choose “Disabled” from the drop-down list.
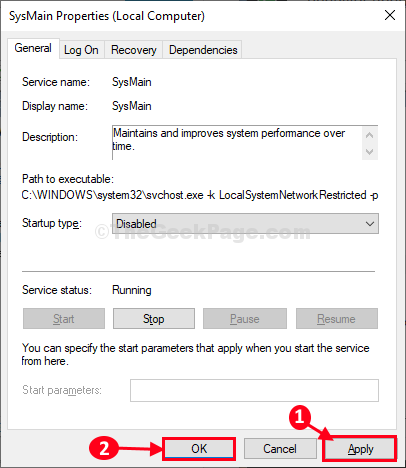
Step 5- Finally, click on “Apply” and then on “OK” to save the changes on your computer.
Now, reboot your windows 10 for changes to come into effect.
3) Disable apps running in Background to solve high ram usage
If you want to ask me which one. I would say every one. Why would any app run in background, when we are not using them. Even if they want to update themselves, it can be done once we open it. So, better shut all of them off.
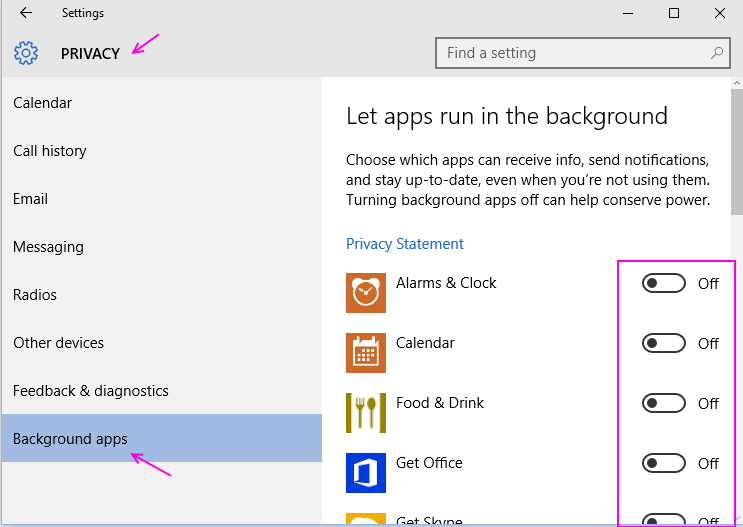
Go to Settings -> Privacy -> Background apps and turn all of them off.
4) Disable Runtime Broker for solving high cpu usage
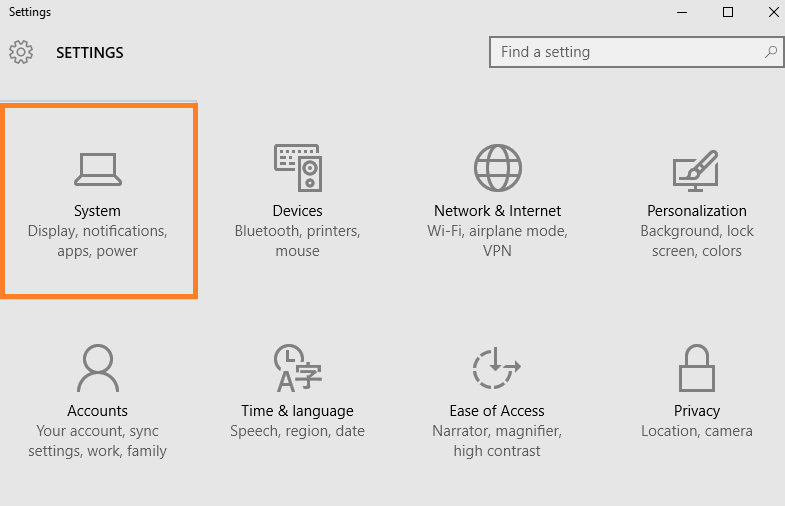
Step 1 – Press windows key + i to open system control panel.
Click on system.
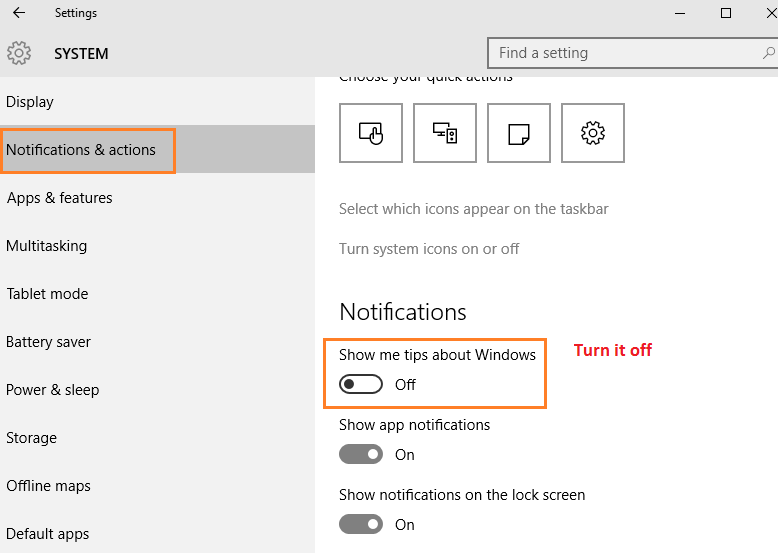
Step 2 – Now, click on Notifications & actions in the left menu.
There is an option in the right side, saying show me tips about windows. Turn it off.
5) Adjust system settings for best performance
Step 1: – Search view advanced system settings in start menu search box.

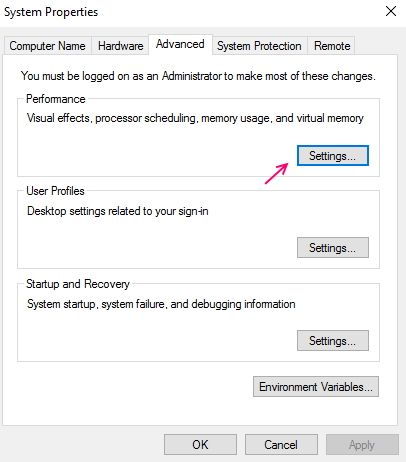
Step 2: – Now, click on settings as shown in the pic.
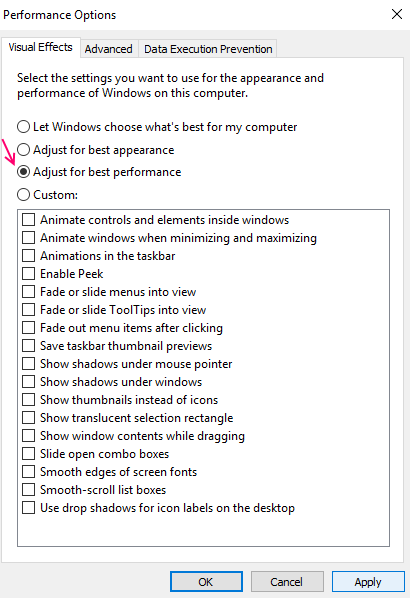
Step 3: – Now, choose adjust for best performance. Finally choose apply and then click ok. Finally restart your PC.
6) Optimize your Hard Drives for faster performance
7) Update Drivers to fix windows 10 high CPU usage
Updating all your drivers can also solve your memory problem, if outdated driver are the reason behind it.
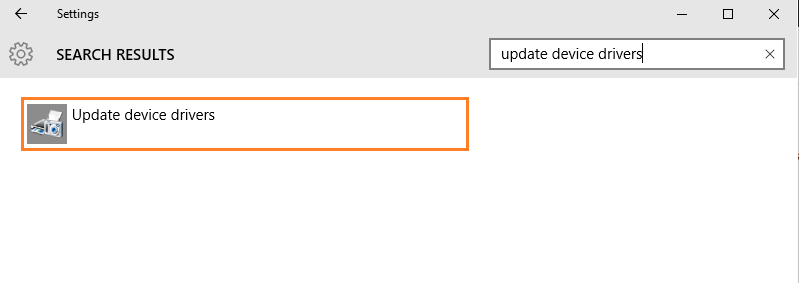
Press windows key + i to open system control panel. Search update device drivers in the search box. Click on update device drivers and proceed.
Note – windows 10 have certain memory requirement. You must be sure that your device is having this much amount of system configuration with it.
Processor
1 Ghz
Installed memory (RAM)
1 GB for 32-bit Operating System
2 GB for 64-bit Operating System
Free hard disk space
16 GB for 32-bit version
20 GB for 64-bit version
If your system configuration is above that, please follow the methods illustrated above. If everything else fails, clean install windows 10. I will update this posts with more ways to tackle high cpu and high ram usage problem of windows 10.
8) Turn off Automatically pick an accent color from my background
Step 1 – Press windows key + i to reach system control panel.
Step 2 – Click on personalization as show below.
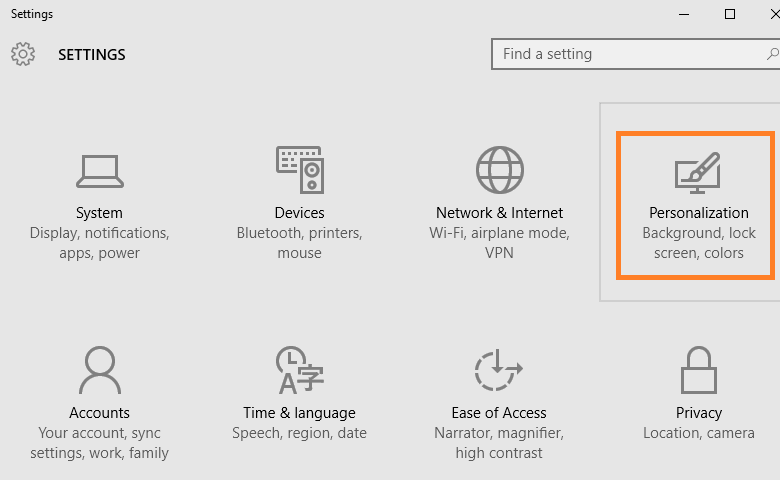
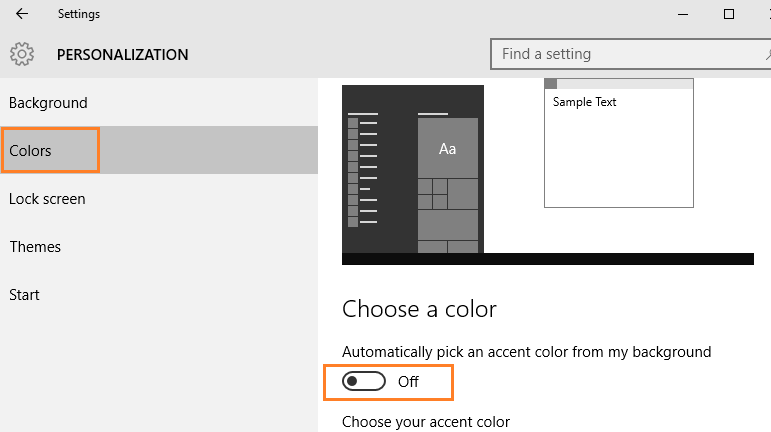
Step 3 – Now, choose colors from the left menu.
In the right side, Turn off Automatically pick an accent color from my background.
No comments:
Post a Comment