When you make any changes in Local Policy Editor it is same for all the users ( both the administrative and non-administrative users). In case if you want to set Group Policy only for the non-administrative users, simply follow the steps of this article.
Apply Group Policy to Non-Administrative users only in Windows 10
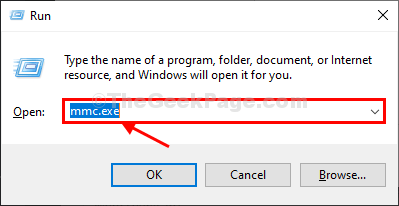
1. Press Windows key+R to launch Run window on your computer. Type “mmc.exe” in Run window and then hit Enter. Microsoft Management Console will be opened.
Click on “Yes” to permit the User Account Control to open Microsoft Management Console window.
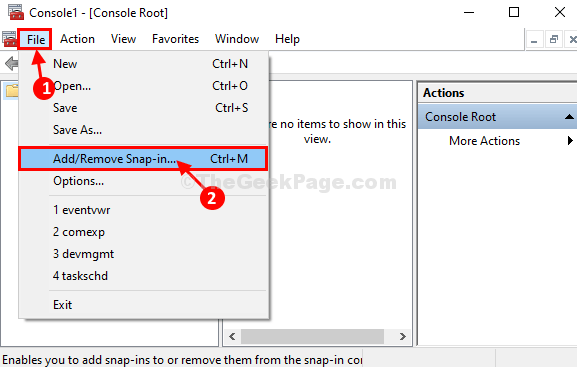
2. In Microsoft Management Console window, click on “File” on the menu-bar and then click on “Add/Remove Snap-in…“.
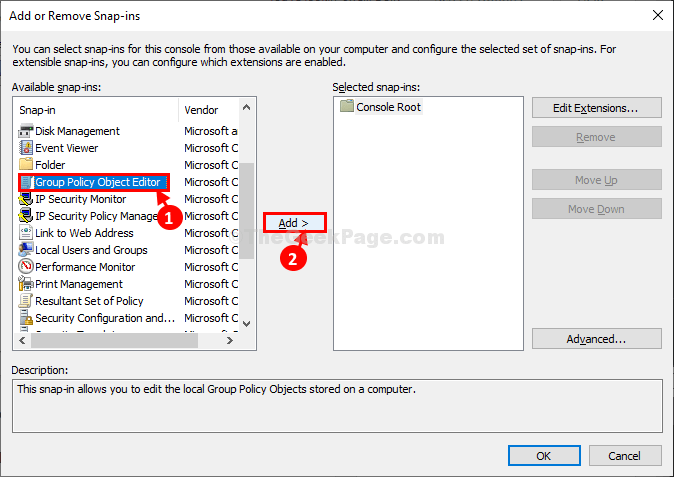
3. In Add or Remove Snap-ins window, on the left hand side, click on to select “Group Policy Object Editor” and then click on “Add” to add it.
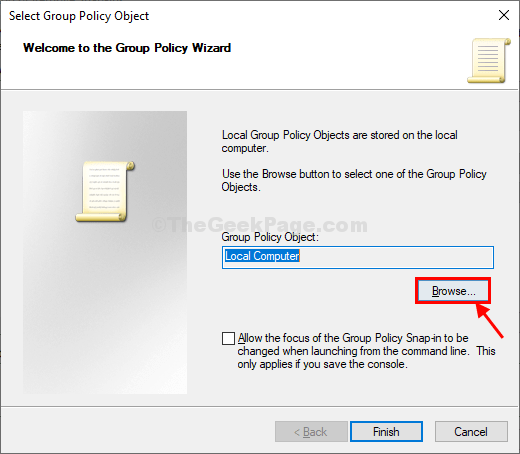
3. In Select Group Policy Object window, click on “Browse“.
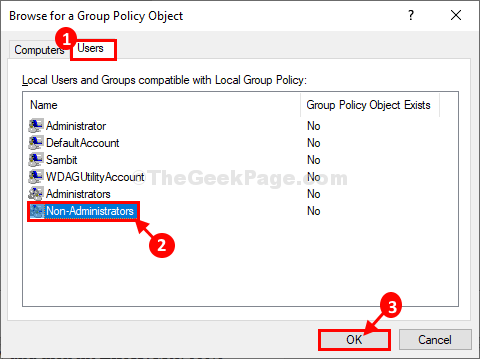
4. In Browse for a Group Policy Object window, first click on “Users” tab, and then click on “Non-administrators“.
5. Click on “OK” to save the changes on your computer.
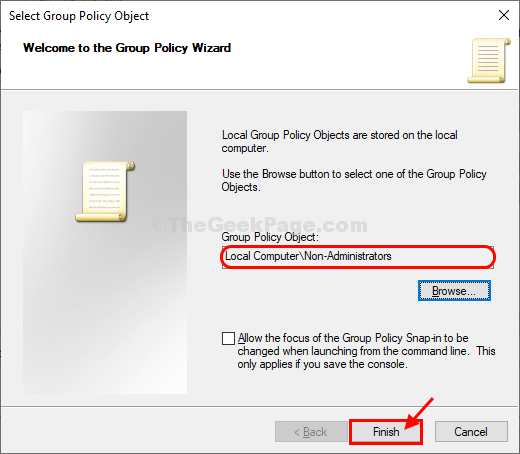
6. Coming back to the Select Group Policy Object window, click on “Finish” to finish the changes.
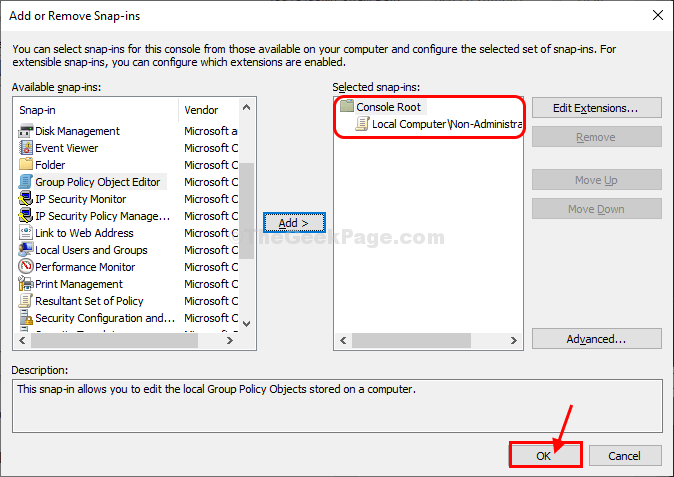
7. Finally, click on “OK” to save the changes.
Now, you have to save this policy on your computer.
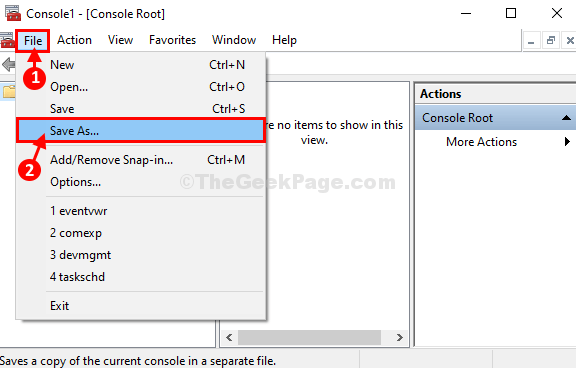
9. In Microsoft Management Console window, click on “File” on the menu-bar and then click on “Save As…“.
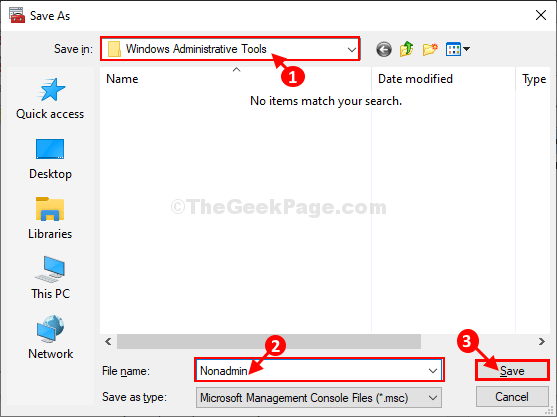
10. In Save As window, choose a favorable location to save this file.
11. Name the file as “Nonadmin” and then click on “Save” the file on your computer.
That’s it! From now on, whatever policy you want to change for the non-administrative users, you simply have to open the new created snap-in first and do the changes. Those policies will not affect any other administrative accounts.
No comments:
Post a Comment