Many users complained about this peculiar problem that the Print spooler service on their windows 10 PC won’t stay started and stop immediately without throwing any error messages. Here is how to Fix this error.
Fix 1 – Through Command Prompt
1. Search command Prompt in Windows 10 Taskbar search.
2. Now, right click on the cmd icon appeared and Run as Administrator.
3. Just Run the command Given below to stop Print spooler Service.
net stop spooler4. Now, again Run the command given below.
net start spoolerYou have just restarted the Print spooler service.
Fix 2 – Clear Your Print Queue
1. Open command Prompt as admin.
2. Now run the command given below , executing each line One by One.
net stop spooler
del %systemroot%\System32\spool\printers\* /Q /F /S
net start spooler
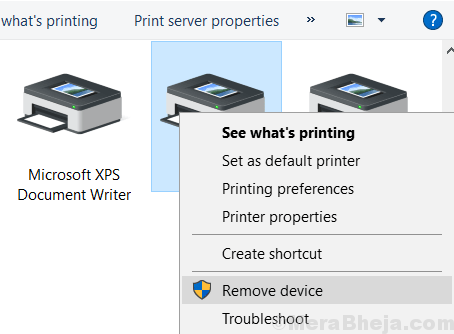
Fix 3 – Remove Printer from Your PC
1. Click on Start Button.
2. Click on Gear shaped icon to Open settings.
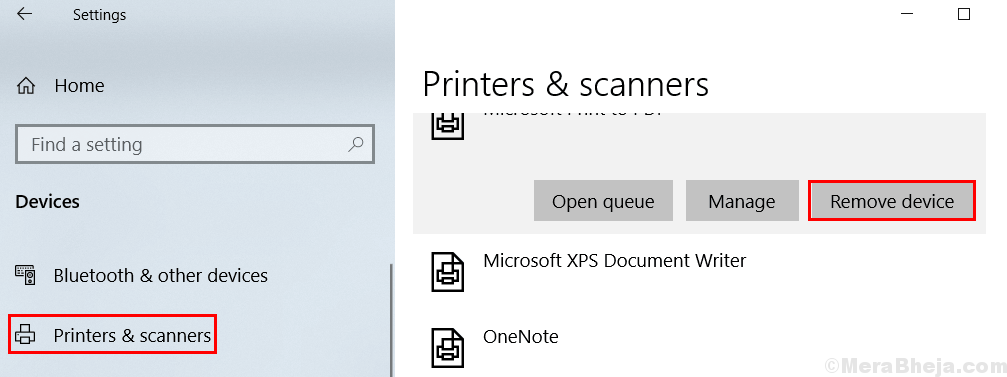
3. Now, Go to Devices.
4. Choose Printers & Scanners from the Left Menu.
5. Now, click on your Printer Device to expand it.
6. Now, Choose Remove Device to remove the Printer.
Fix 5 – Change Recovery options
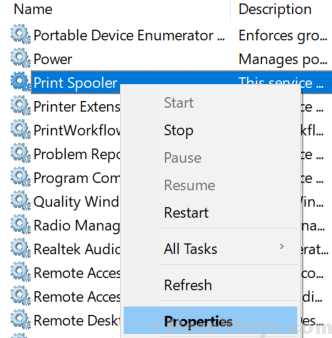
1. Search Services in the Search Box.
2. Now, Click on Services to Open Service manager
3. Now, right click on the Print Spooler Service and Select Properties.
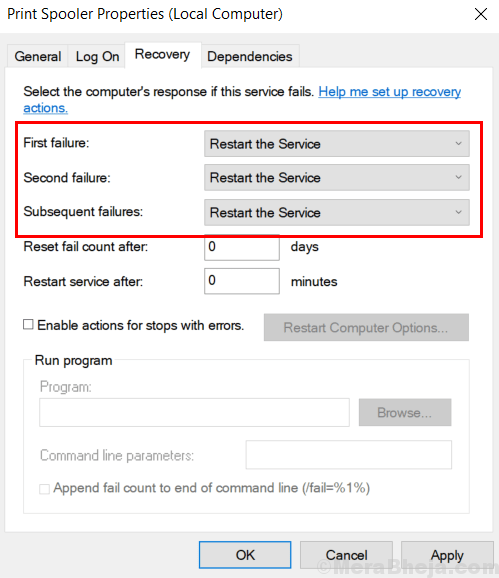
4. Now, Select Recovery Tab.
5. Now, make sure that restart the service is selected in all the failures condition as shown.
Fix 6 – Delete Print Spooler Files
1. Press Windows key and R key Together to Open RUN.
2. Now, write services.msc in it and Press Enter.
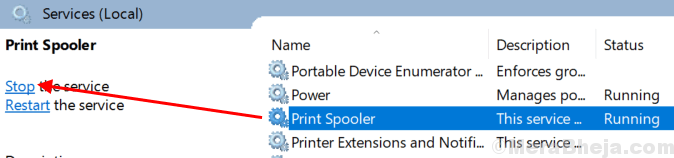
3. Once the service manager Opens Up, just Find Print Spooler Service.
4. Now, Click on It and Stop it to stop this service.
5. Now, Go to File explorer.
6. Now, Go to C:\Windows\System32\spool\PRINTERS
7. Now, delete all the files in the folder.
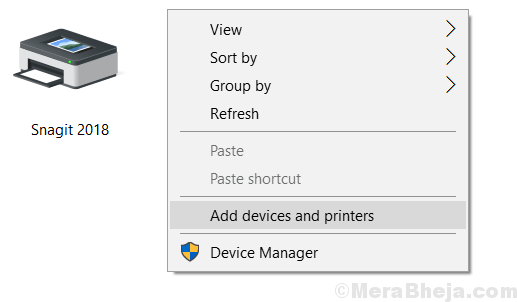
8.Now, Search control panel in Taskbar Search
9. Click on Control Panel Icon and Go to Control Panel.
10. Now, Choose View By Category.
11. Now, Click on View Devices & Printers.
12. Now, Right click on your Printer and Remove Printer.
13. Now, start the Print Spooler service again by Going to service manager.
14. Now, Right click anywhere in Devices & Printer and Add a Printer again.
No comments:
Post a Comment