Users must have noticed that whenever a DVD/CD/USB is inserted, a window pops up asking for the next intended action with the removable disk files. This is the default setting for Windows 10. However, for users who enable AutoPlay on their devices, the media in the removable disk might start playing the file as soon as Windows reads the data. The same could happen with other applications.
Here’s how to configure AutoPlay as per your needs.
While AutoPlay might be helpful for many, most of us would prefer to choose prompts before deciding upon actions. Thus, Windows 10 allows users to enable/disable AutoPlay. The various methods to do so are as follow:
Method 1 – Enable or disable AutoPlay in Windows 10 Settings
1] Click on the Start button and then on the gear-like symbol to open the Setting page.
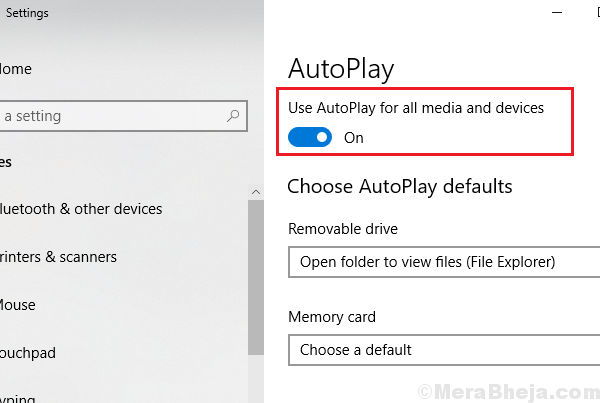
2] Select Devices from the list and then on the list on the left-hand side, click on AutoPlay to open the AutoPlay settings.
3] Use the blue toggle switch to Enable or Disable AutoPlay.
4] Restart the system.
Method 2 – Enable or disable AutoPlay in Control Panel
1] Press Win + R to open the Run window. Type the command control panel and press Enter to open Control Panel.
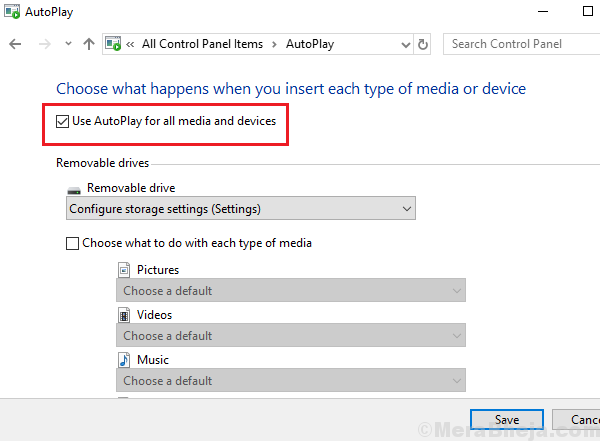
2] Go to Hardware and Sound >> AutoPlay.
3] To enable AutoPlay, check the box corresponding to “Use AutoPlay for all media and devices.”
4] We could also disable AutoPlay for specific applications in the next section.
5] Click on Save to save the settings and then restart the system.
Method 3 – Enable or disable AutoPlay in Registry
1] Press Win + R to open the Run window and type the command regedit. Press Enter to open the Registry Editor.
2] Navigate to the following key:
- HKEY_CURRENT_USER
- SOFTWARE
- Microsoft
- Windows
- CurrentVersion
- Explorer
- AutoplayHandlers
3] On the right-pane, double-click and open DisableAutoplay.
4] Change it’s value to the following as per your requirements:
To enable AutoPlay: 0
To disable AutoPlay: 1
5] Click on OK and reboot the system.
Method 4 – Enable or disable AutoPlay in Local Group Policy editor
1] Press Win + R to open the Run window and type the command gpedit.msc. Press Enter to open the Local Group Policy editor.
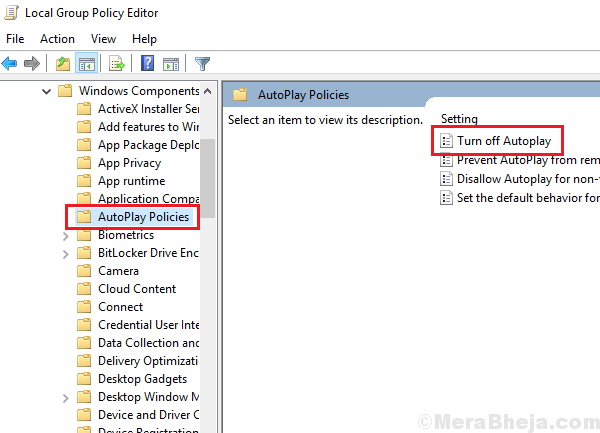
2] Navigate to the policy: Computer Configuration >> Administrative Templates >> Windows Components >> AutoPlay Policies.
3] In the right-pane, double-click Turn off AutoPlay.
4] And important point to be noted is that to enable AutoPlay, we need to set this policy to Disabled and to disable this policy, we need to set this policy to Enabled.
5] In the Turn off AutoPlay on the drop-down menu, change the status to All Drives.
6] Click Apply followed by OK and then reboot the system.


No comments:
Post a Comment